


A guide to egg quality
Chick quality starts with egg quality. “You cannot make a good chick out of a bad egg’. By:
By: 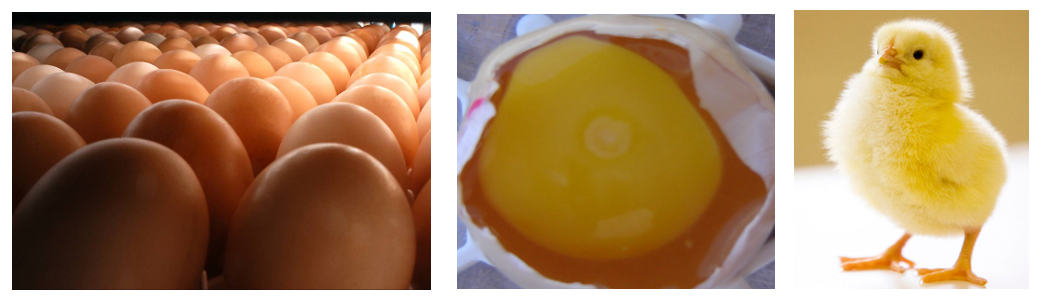
The outcome of the laying farm supplying hatching eggs to produce good quality chicks is reliant on 4 key areas:
- Egg handling and selection
- Egg disinfection
- Egg storage
- Egg quality control
1. Egg handling and selection
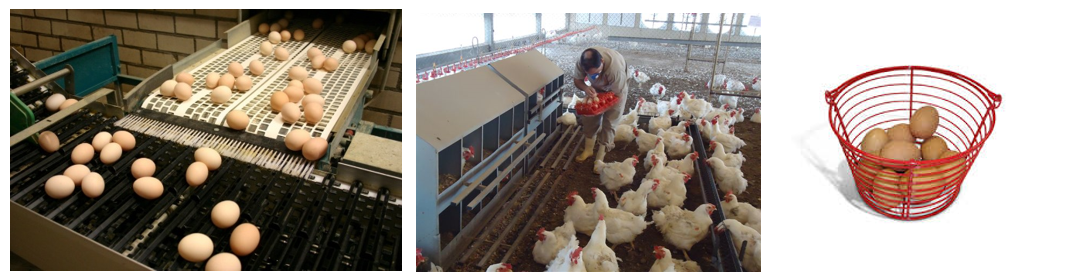
Egg collections:
- At least 4 times a day. In hot climates, as many times as possible.
- Collect nest eggs separately from floor eggs and distinguish clearly.
- Prevent rough handling – can cause cracks/damage the chalazae and internal membranes resulting in higher embryo mortality. Beware of eggs rolling too fast off conveyor belts from automatic nests that can cause cracks. Adjust belts to prevent inclines or ledges where eggs can accumulate and cause cracks. Do not place too many eggs in a basket or stack plastic egg flats too high causing cracks.
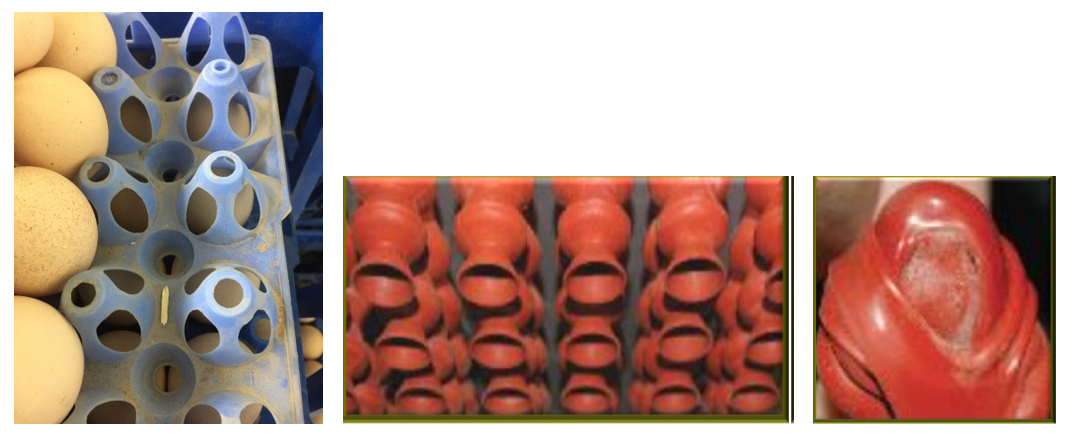
- Ensure that equipment is washed and kept clean daily or more frequent, including egg trays and vacuum suction cups that can harbor mould spores. Mould, including Aspergillus, can be transmitted to the egg (see photo below). Change nest pads in automatic nest systems at least once during the flock to prevent accumulation of fecal material.
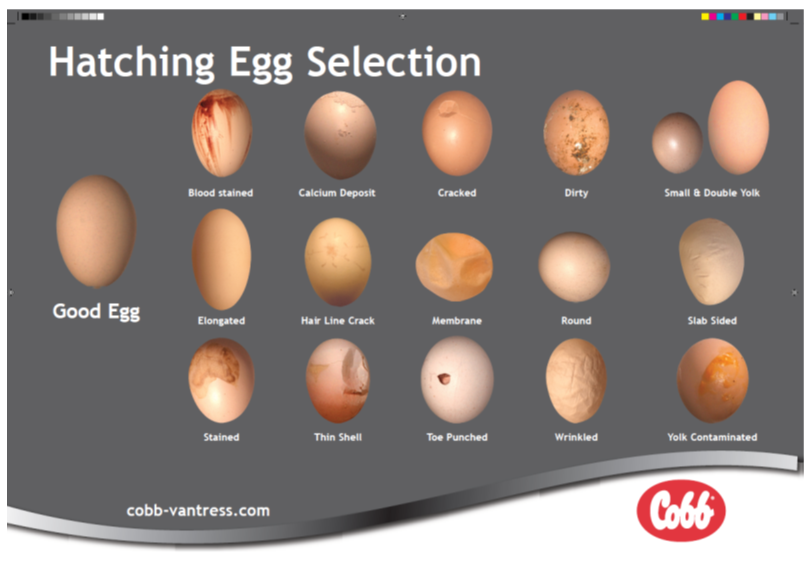
Hatching egg selection:
- The ideal hatching egg should weigh between 50 and 68 grams (depending upon flock age), have clearly defined round and pointed ends, good colour, clean and undamaged shell free from infection. Egg weights and grading will vary by individual operations and need for eggs.
- Details of ‘reject’ eggs or eggs unsuitable for hatching can be identified on Cobb’s ‘Hatching Egg Selection’ poster (see below).
- Conditions of the eggs – Egg condition has been shown to have negative impacts upon performance including:
- Dirty eggs – ( reduced hatchability and higher risk of contamination (Omphalitis and Aspergillus).
- Cracked eggs – same as above.
- Mis-shaped eggs – reduced hatchability and higher cull levels.
- Double-yolks – reject egg, no hatchability.
- Upside-down eggs – reduced hatchability and more culls.
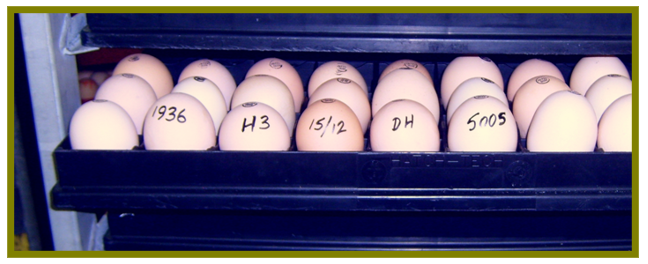
Egg identification:
- Clearly mark eggs on incubator trays or in boxes with the flock code, date of lay, house number and egg grader initials.
- Floor eggs should be marked in a different colour for ease of identification and always placed in the bottom trays on the trolley.
- Additional egg marking or stamping should be done aligned with the purpose of the eggs and/or legislative requirements.
2. Egg disinfection
The temperature of the egg is around 41°C when it is laid and cools down very quickly. The shell is composed of thousands of tiny pores and it is important to conduct disinfection treatment as soon as possible after lay to prevent bacteria from penetrating the egg.
There are 3 key points to consider when disinfecting hatching eggs:
- Minimising the time between the egg being laid and disinfection
- The method of treatment
- Disinfectant being used
All disinfection methods work…. When you don’t have a problem!!
Disinfection Methods –
- Dry cleaning – ‘buffing’ eggs. Danger is blocking the pores and damaging cuticle.
- Washing eggs – manually in a solution. Risk of removing the cuticle and contamination from the solution after batches of eggs.
- Hot water sanitizing – automated machines. Same risk as washing eggs.
- UV light exposure – some are linked to the sanitizing unit. Need to make sure the bulbs are routinely changed for effective microbial destruction.
- Dry fogging – smoke/misting equipment. Need to prevent droplets from the machine which can wet the surface of the egg.
- Fumigation – exposure to formaldehyde gas. Banned in some countries.
Disinfectants - There are many effective products available on the market for disinfecting hatching eggs. The most important criteria are –
- Correct usage
- Correct dilution rates
- Correct application/exposure time
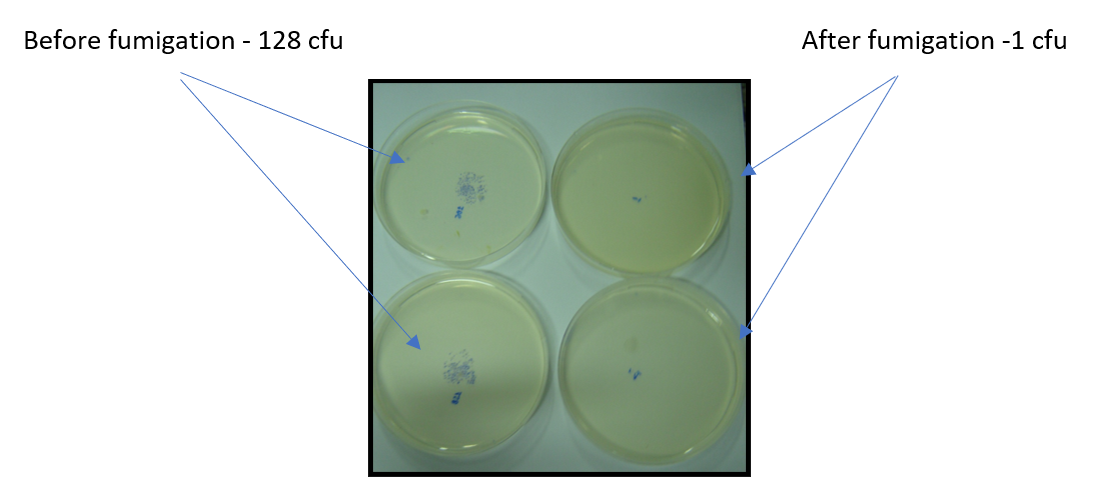
- Effectiveness – swab eggshell surfaces before and after disinfection with total viable counts (TVC) contact plates to verify significant reduction in bacterial counts (see photo below).
3. Egg Storage
Once the egg is laid, the hatching potential can only be maintained and not be improved. The fertile hatching egg contains 40,000 to 60,000 differentiated cells at moment of oviposition, which have to be kept under the most ideal conditions to prevent deterioration.
Egg storage environment
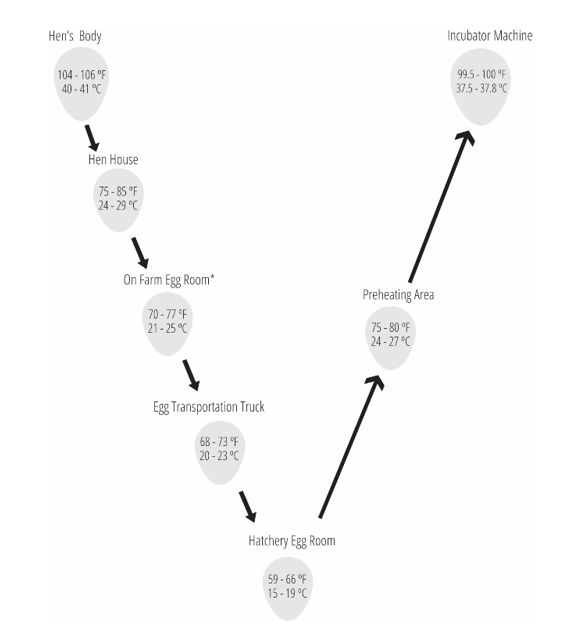
From the time the egg is laid until storage in the hatchery, the temperature profile should be ‘V’- shaped. The hatchery should have the lowest storage temperature as shown in the flow chart below. The environment in the hatchery egg store is normally more controlled than at farm level and deviations from the temperature setpoints are minimal.
Eggs need to be kept below 24°C (‘Physiological Zero’ – the temperature at which embryo development does not advance) after they have been laid (see temperature flow chart below).
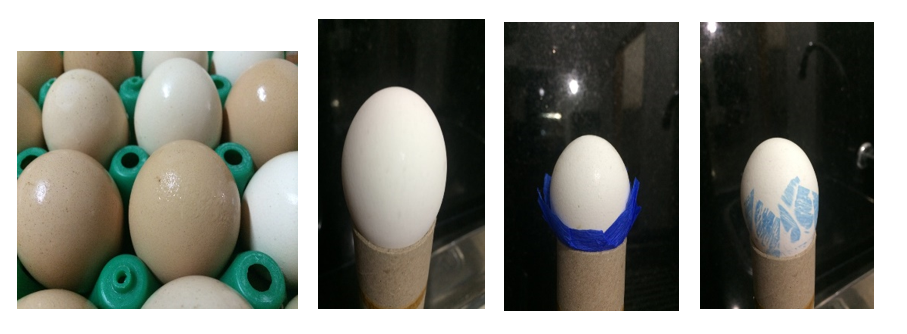
Humidity levels are generally kept between 65 to 75% RH. Do not move eggs from a colder environment to a warmer one as eggs can condensate or ‘sweat’. This increases the risk of moisture penetrating the shell and subsequently causing greater risk of contaminated eggs. A simple test to check if eggs have been subjected to condensation/sweating before or on arrival to the hatchery is to place ‘crepe paper’ around a couple of eggs when traying up and check for dye marks on the shell at the hatchery (see photos below).
Length of storage
There are 3 main issues with increased egg age:
- What happens to the egg?
- What are the effects of prolonged storage?
- What methods are available for storing eggs for long periods?
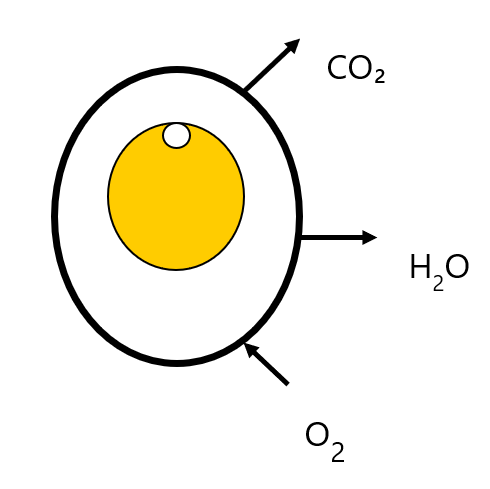
What happens to the egg?
Egg characteristics
CO2 and H2O effuse
Albumen pH changes from 7.6 to 9.0
Yolk pH changes from 6.0 to 6.5
Reduced albumen height
Reduced yolk membrane strength
Albumen liquefaction:
- from nutrients transfer
- and effusion of gases
What are the effects of prolonged storage?
- Loss in hatchability
- Need for extra incubation hours
- Decline in specific gravity
- Weight loss (+/- 0.05% per day)
- Chick quality – fewer viable chicks
- Mortality – increased 7-day mortality
- Reduced performance
What methods are available for storing eggs for long periods?
Under ideal conditions of storage, hatchability will start to decline after 7 days of egg age.
Many techniques have been applied to minimize losses from increased egg age. They include:
- Turning eggs in storage
- Use of ‘buggy bags’(covering eggs with plastic bags) to minimize gas exchange
- Storing eggs upside down
- Flushing eggs with nitrogen in sealed bags/boxes
- High CO2 during storage
- Low O2 during storage
- Lower storage temperatures
- Slow warming profile at the start of incubation
- Heat treatment of hatching eggs during storage
4. Egg quality control
Remember that the hatching egg is the hatcheries ‘raw material’, so adverse quality will result in adverse performance. Too often when we troubleshoot for hatchery problems, the cause or significant part of the loss is down to the basics with poor hatching egg quality.
What should we do?
- Conduct routine checks on incoming eggs for cracks and eggs positioned upside down. These 2 categories give the greatest loss in hatch percentage.
- Weigh samples of eggs from flocks for uniformity. Chick weight = two-thirds or 67% of egg weight. More variation in egg weights = less uniformity and potentially more culling on broiler farm.
- Select a few eggs to check internal egg temperatures using a temperature probe. Can indicate whether there is an issue in transit or at farm.
- Take TVC swab samples on eggshells to check bacterial load.
- Use an ultra-violet (UV) light to see if egg washing has taken place.
- GIVE positive and negative FEEDBACK to farms including non-compliance. This is not a blame game but a common goal for both farms and hatchery.
 16 June 2026
 2
minute read
2
minute read