


Beginner's guide to building your first chicken coop
With basic woodworking skills and a chicken coop plan, you can build a safe, sturdy coop 23 August 2023
 6 minute read
 By:
By: Raising chickens is a rewarding hobby and an easy way to practice sustainable living right in your backyard. If you're intrigued by the idea of raising chickens, one of the things you will need is a chicken coop. Building your own chicken coop is a great way to save money and provide a safe and comfortable home for your chickens. Interestingly, you don't need to be a professional woodworker. With basic woodworking skills and a chicken coop plan, you can build a coop suited to your needs and chickens.
For aspiring chicken growers, this guide will cover how to build a chicken coop for your first flock. While the exact specifications of your chicken coops can vary, depending on the number of birds you want to keep and the breed, these steps are sure to help you build a safe and sturdy coop that will stand the test of time.
What you need to know before building a chicken coop
When building a chicken coop, the goal is to build a healthy and safe home for your chickens. The coop should protect the birds from predators, drafts and chills in winter, and overheating in summer. Regardless of the size, building a chicken coop requires proper planning. Answering these questions will help you set a feasible budget for the project and build a coop that will provide your chickens with a safe, healthy, and happy environment.
- How much space do you have?
- How many chickens do you intend to have?
- What climate do you live in?
- What materials will you use?
There are a variety of materials you can use to build your chicken coop, each with its pros and cons. Wood is the most common material for building chicken coops, preferred for its affordability and availability. The material you choose will depend on your budget, climate, and personal preference.
How large your coop will largely depend on how many chickens you want to raise. Many chickens need about 4 square feet of coop space per bird, but depending on the breed, the coop space you provide per bard can vary between 3 – 6 square feet of space.
How to build a chicken coop
Building a chicken coop can be a rewarding DIY project. It is a perfect way to showcase your creativity, craftsmanship, and care for your chickens. However, before putting up your coop, keep in mind that you may need a permit to build a chicken, depending on where you live.
Here are steps to build a functional yet modern coop for your chickens:
Step 1: Choose your plan
There are many detailed, easy-to-understand, free chicken coop plans to help beginners and seasoned chicken growers build functional chicken coops. Whether you have a small backyard or an extensive piece of land, you can always find a suitable plan depending on the number of chickens you want to raise.
When selecting a plan, consider the functionality aspects, especially easy access for cleaning, egg collection, and regular maintenance. Some areas might have specific requirements regarding building any structures, so check local zoning and regulations.
Step 2: Material selection and collection
To build a chicken coop, you will need the following:
- Wood
- Hardware cloth
- Nails and screws
- Drill and drill bit
- Framing square
- Saw
- Hammer
- Measure tape
Wood is preferred because it is relatively easy to work with and more affordable than many other options. However, it should be properly treated to prevent rotting. With a larger budget, you can go for pricier options like redwood, which is naturally rot- and pest-resistant. Regardless of the wood you use, proper construction can help deter predators.
Note: While wood is the most commonly used material for building chicken coops, there are many materials bird lovers can use to build their first chicken coop. You can use metal, plastic, or recyclable materials like pallets and leftover pieces.
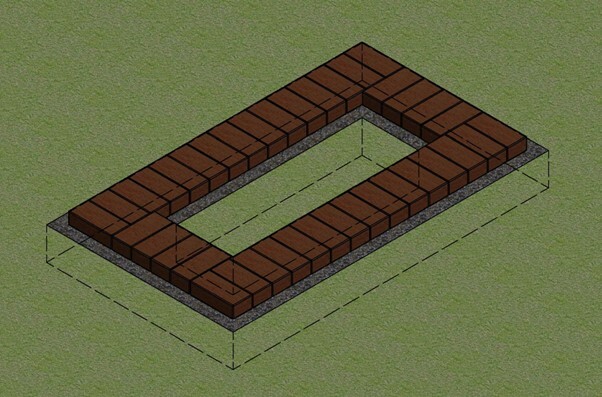
Step 3: Preparing the ground and foundation
Once you have everything ready, you can start building your coop. Choose an appropriate location to build your backyard chicken coop, about 30 feet from the house, and prepare the area by clearing any vegetation and leveling it.
Next, measure and mark out the ground, depending on how large you want your coop to be, then dig trenches at least 8 inches deep. A general rule: the larger the coop, the deeper the trenches should be. Guided by the diagram below, fill the trenches to ground level with concrete, let the concrete cure, and lay bricks around the perimeter to create a solid foundation for your coop.
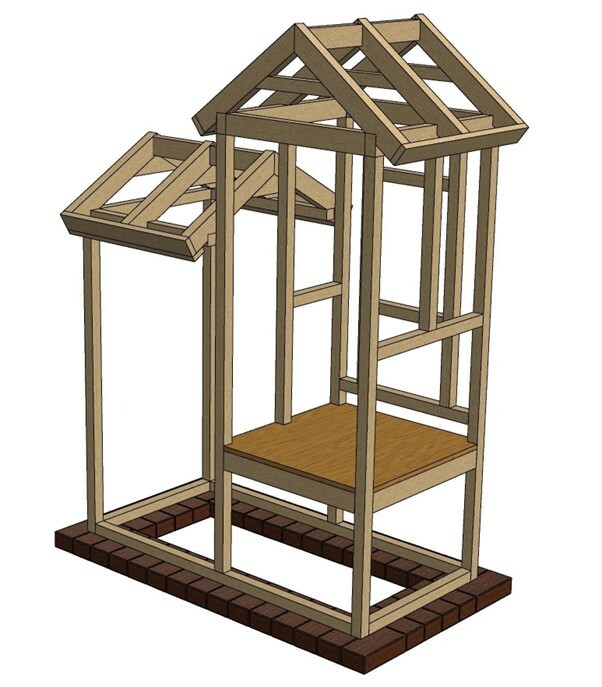
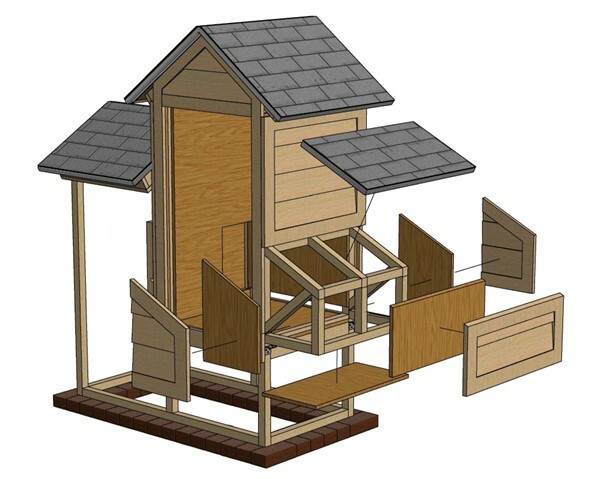
Step 4: Building your coop frame
The frame plays a pivotal role in ensuring the coop’s structural integrity and lifespan, so it needs to be sturdy and waterproof. Start by cutting the lumber, and remember to account for the lumber’s thickness when cutting. 2x4 boards are recommended for framing chicken coops.
With all the boards cut, assemble the base and screw the pieces together, attach vertical posts, and install the horizontal beams. Next, frame for the door and windows, and then build the roof support and attach it.
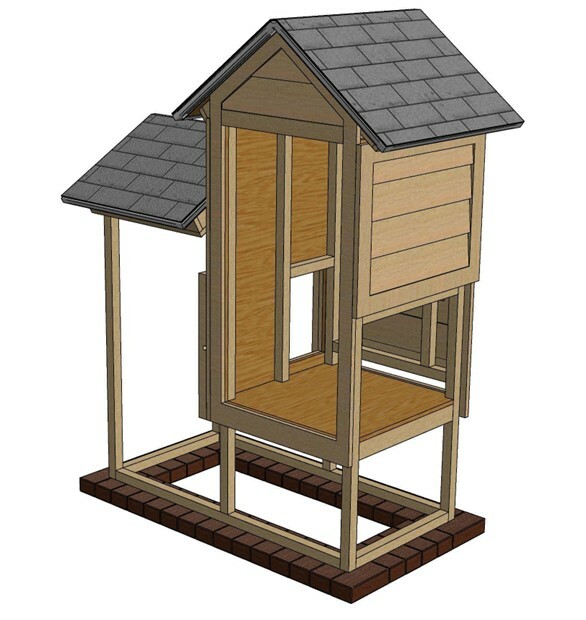
Step 5: Outer sheathing of walls and roof
After constructing the frame, the next step is to add sheathing, the other layer that insulates the coop and keeps it dry. Plywood is a common sheathing material that’s easy to install for beginners. Start by sheathing the walls, then move on to the roof. Remember to cut openings in the sheathing for the door and windows.
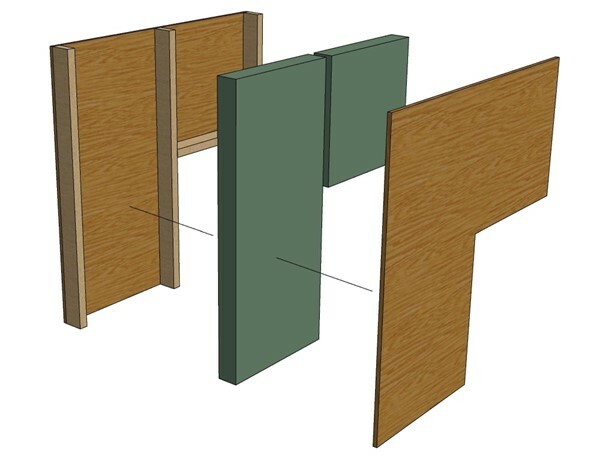
Step 6: Insulation and internal cladding
Insulating your chicken coop helps enhance your chickens’ comfort, especially during winter and summer. Cut the insulating material of choice and install it using the appropriate adhesive or staples, then install the cladding. Remember to trim the cladding material for a smooth finish.
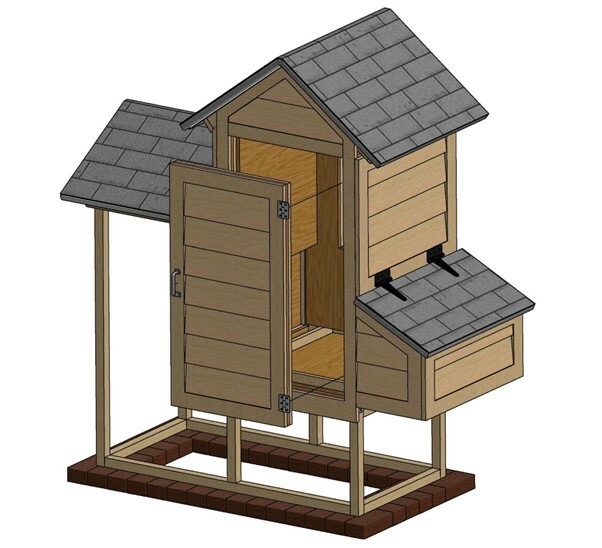
Step 7: Nesting boxes
Nesting boxes are where your chickens lay eggs. Using the diagram below, build the frame for nesting boxes, install the sheathing, and then install the roof.
Step 8: Installing a window and Litter Tray
A window and litter tray provide convenience and contribute to the coop’s functionality. Construct the elements and install them in the spaces using the diagrams below for reference.
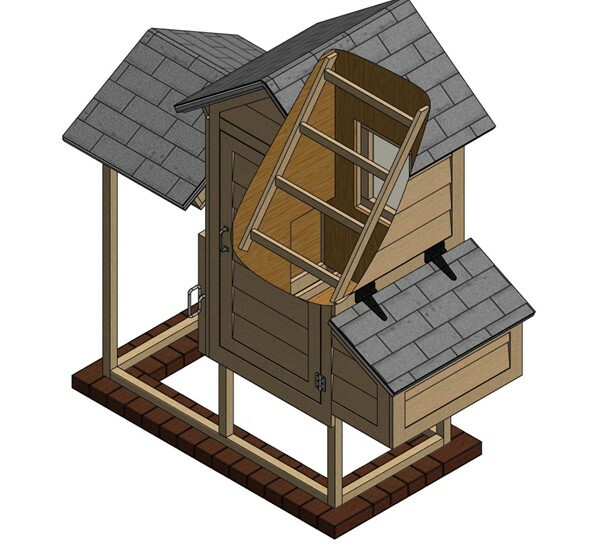
Step 9: Installing a sturdy door
A coop’s door allows your chickens to enter and exit the coop and offers access for you to collect eggs and clean the coop’s interior. Build your coop’s door using solid boards and install it. Use the diagram below as a reference in this step.
Step 9: Add roosts
Roosts are where chickens perch to rest and sleep at night. They should provide at least 10 feet of space per bird. Using the illustration below as a reference, add roosting bara enough for the flock you plan to raise.
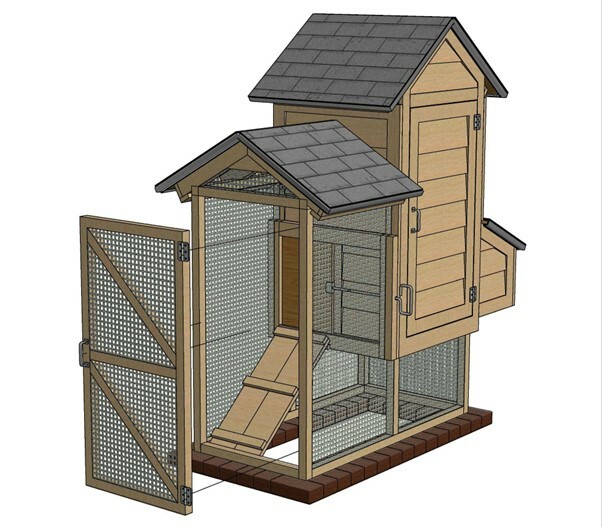
Step 10: Wire mesh run sheathing
Fencing in the run is a great way to provide a safe space for your chickens to exercise and forage. Using hardware cloth, fence in your run and secure the haywire mesh to the frames using staples and nails.
Conclusion
Chicken coops are relatively easy to build. Even with meager woodworking skills, you can build a secure and comfortable coop that ensures the health, safety, and happiness of your chickens. To succeed in creating your first coop, embrace the learning process and adapt as needed.