


Cobb Breeder Management Guide: Equipment checks
Learn more about checking your equipment ahead of chick placement 22 February 2024
 9 minute read
 By:
By: Part of Series:
Editor's note: This article is an excerpt from the Cobb Breeder Management Guide and additional articles will follow. The Guide was designed to highlight critical factors that are most likely to influence flock performance. The management recommendations discussed were developed specifically for Cobb products. The recommendations are intended as a reference and supplement to your own flock management skills so that you can apply your knowledge and judgement to obtain consistently good results with the Cobb family of products. To read or download the complete Guide or to view Cobb's other management guides, click here.
Before placing chicks, the equipment and environment should be thoroughly assessed and adjusted as needed. Below are some guidelines.
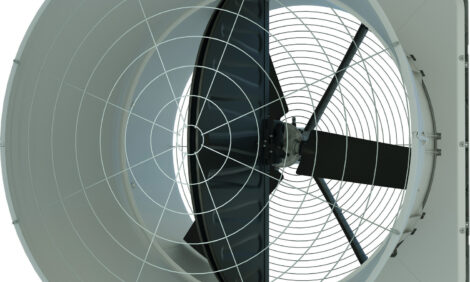
Minimum ventilation checks
- Minimum ventilation should be activated as soon as the preheating begins, to remove waste gases and any excess moisture.
- Seal air leaks to eliminate drafts on chicks.
- Check carbon dioxide level before placing chicks. CO2 levels should always be <3000 ppm.
- If chemicals are used during the cleaning and disinfection phase prior to chick placement, adequate ventilation must be used to clear the house of the residue and to provide clean air for the chicks.
Ambient air temperature checks
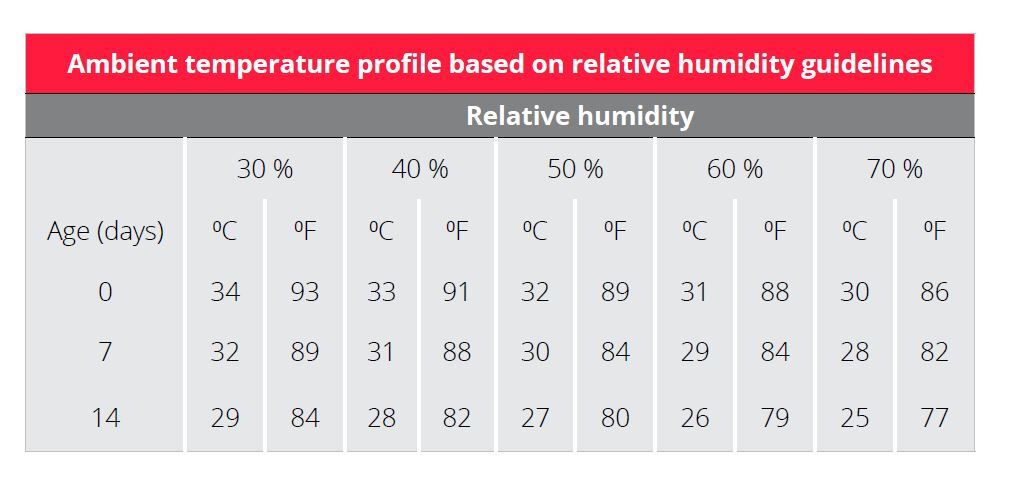
Temperature sensation is affected by temperature transfer and relative humidity of the air. If air is dry with low RH % transfer is low and higher dry bulb temperatures should be used as illustrated in the table to the right.
Heater checks
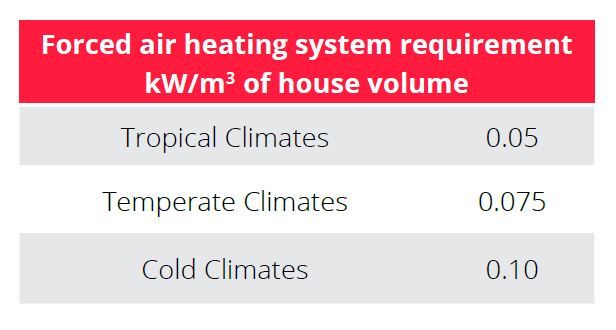
The key to maximizing bird performance and welfare outcomes is providing a consistent housing environment optimized for the needs of the birds. This is especially critical for young birds where a consistent ambient and floor temperature are necessary to promote good activity and normal behavior. The heating capacity requirement depends on ambient temperature, roof insulation and house sealing. Verify that all heaters are installed at the recommended height and are operating at maximum output. Heaters must be checked and serviced BEFORE preheating begins.
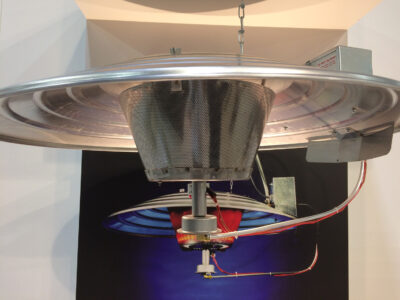
Generally radiant brooders used in conjunction with forced air heaters are the most efficient. Radiant brooders are used as a primary heat source during brooding while forced air heaters provide supplemental heat in cold weather.
As the flock matures, birds develop the ability to regulate their internal body temperature. At approximately 14 days of age, forced air heaters can become the primary heat source, but should only be used in well insulated solid wall houses. Radiant type heaters should be used as the primary heat source in poorly insulated houses.
Radiant / Spot brooders
Either traditional pancake brooders or radiant brooder systems are used to create floor and litter heating patterns within the house. These systems allow the chicks to move around the brood chamber and find their comfort zone. There should be some available water and feed close to this heat source.
Under floor heating
This system operates with hot water circulating through pipes in a concrete floor. The heat exchange within the floor warms the litter and the brooding area.
Forced air heaters
These heaters need to be placed where the air movement is slow enough to allow optimum heating of the air, normally in the middle of the house. These heaters should be placed at a height of 1.4 to 1.5 m (4 1/2 to 5 ft) from the floor - a height that will not cause drafts on the chicks. Forced air heaters should never be placed near the air inlet because it is impossible for them to heat air that is moving very fast. Heaters placed at the inlets will lead to an increase in energy usage and cost.
Floor temperature checks
Often concrete/litter temperature is measured quickly at chick placement in a few random areas, which is not representative of the true uniformity of concrete/litter temperatures. The best approach is to measure (both concrete/litter) every 6 meters (20 ft) along the length of the poultry house and in three rows across the width of the house. This will help identify hot or cold zones in the house prior to chick placement. The litter temperature should be recorded before each placement. This will help to evaluate the preheating effectiveness and make any necessary adjustments for future placements.
- Houses should be preheated so that both the floor and ambient temperatures and humidity are stabilized at least 24 hours before placement.
- To achieve the above targets, preheating needs to commence at least 48 hours before chick placement.
- Preheating time is dependent on climate conditions, house insulation and heating capacity and will vary from farm to farm.
- Concrete temperature (below litter) should be 28 to 30°C (82.4 to 86.0°F). Concrete temperature should never exceed 32°C (90°F).
- At placement, litter temperatures should be 30 to 32°C (86 to 90°F) with forced air heating.
- If radiant heater/brooder stoves are used, floor temperatures should be 40.5°C (105 °F) under the heat source.
- Floor temperatures should be 30 to a maximum of 32°C (86 to 90⁰F) when checked at least 1 m (3 ft) away from the center of the radiant heater or brooder stove. Above 32°C (90⁰F ) feed intake decreases, and at 35 °C (95 °F) stops altogether.
- The difference between the temperature (at chick level) in the front and back of the reception area should not exceed 0.20ºC (0.36ºF). Uniform temperatures can be achieved using recirculation fans to mix the air constantly.

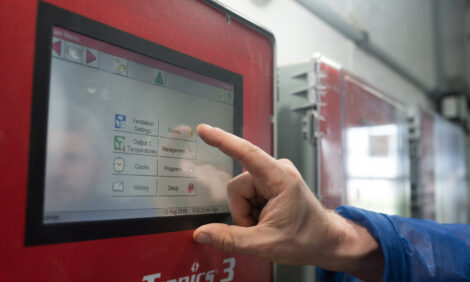
Thermostats or temperature probe checks
- Placed at bird height and evenly distributed around the house. Do not place directly under the heating source.
- Thermostats and temperature probes should be calibrated at least annually, or sooner if doubt exists about accuracy.
- Minimum/maximum thermometers should be placed adjacent to thermostat.
- Temperature ranges should be recorded daily and not deviate by more than 2°C (4°F) over a 24-hour period.
Drinker checks
- For partial house brooding, allow 40 chicks per nipple. When the house is fully opened, allow 8 to 10 birds per nipple.
- For bell drinkers, allow 75 birds per drinker. For some bell drinker designs, the lip of the drinker may be too high and the chicks will not be able to reach the water. In this case, supplementary drinkers will be necessary.
- Flush all drinkers to remove any residual sanitizer. Water must be clean and fresh.
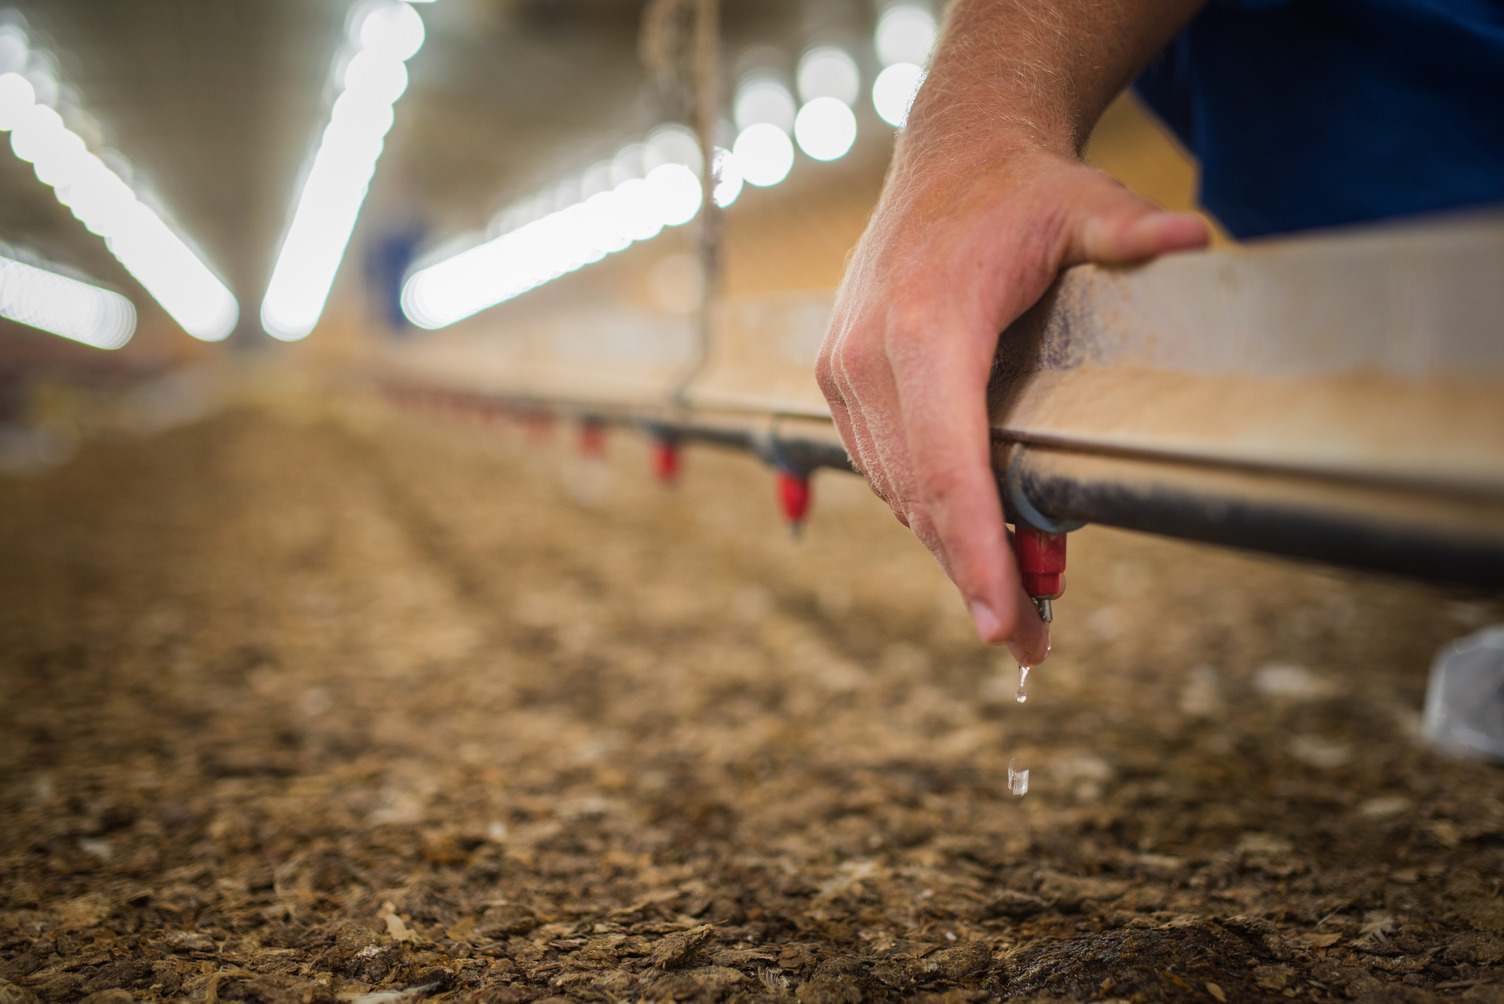
- Adjust pressure to produce a droplet of water visible on each nipple, without dripping. Check for any specific recommendations from the manufacturer for pressure settings.
- Check for water leaks and air locks.
- Ensure that nipple drinkers are at the chicks’ eye level at reception. Adjust lines after 2 days so the chicks’ necks are slightly stretched to drink.
- If needed, supply 1 supplementary drinker (3.8 L, 1 gal) per 100 chicks. Supplemental drinkers should be placed slightly higher than the litter to maintain water quality but not so high that access is impeded. For example, on top of a box lid or egg flat. They should also be placed close to the primary source.
- Conduct water bacteriological analysis before chick placement to assess the quality of the cleaning and disinfection process. Check the sanitizer concentration at the end of the loops daily.
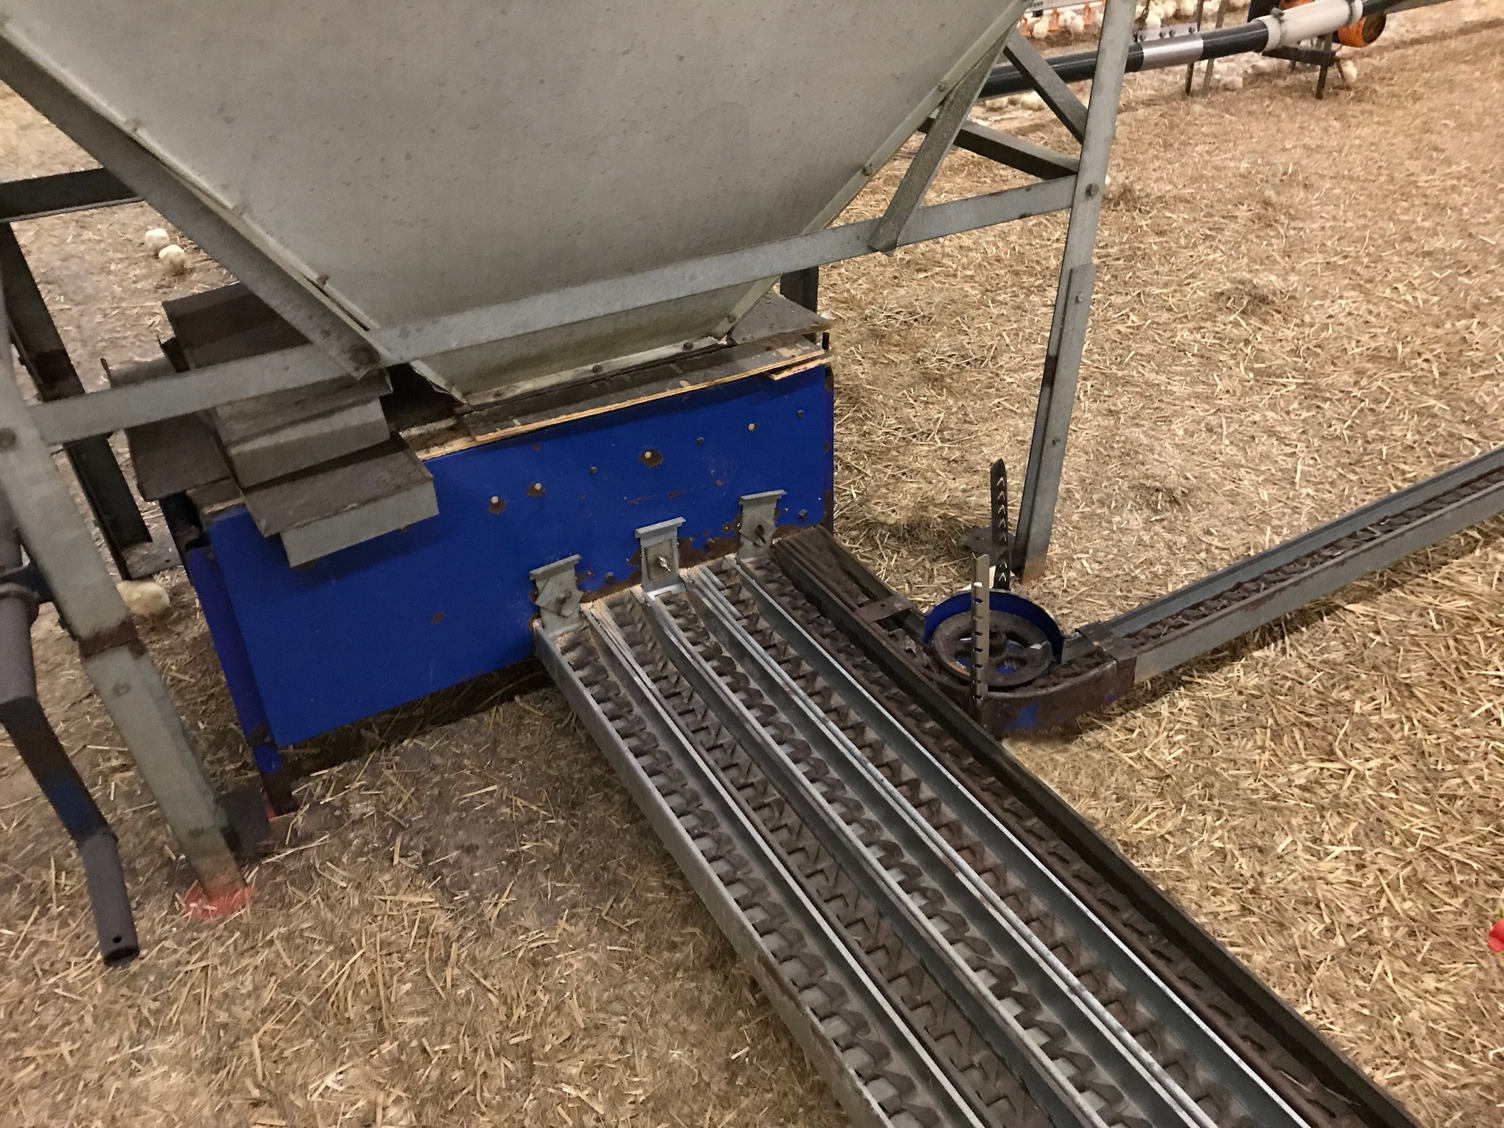
Feeder checks
- Run the feeding system prior to chick placement to detect any minor problems and correct any issues.
- Check feed distribution lines to ensure they are level and secured.
- For chain feeder systems, lubricate the system per manufacturer’s instructions. Check the chain tension and scan the line for foreign objects that can become lodged and damage the system.
- Ensure feed hoppers are clean, dry and ready to be filled.
- Feeders should be adjusted for chick height. Initially, feeders (pan and chain) should be at ground level so the chicks can easily access them.
- Calibrate the scales used to weigh the feed prior to the flock placement. Accurate weighing of feed is critical to prevent over or under feeding the flock.
Maintenance
Equipment failures can be devastating and result in massive losses. A comprehensive farm plan should include regular, scheduled and preventative maintenance to prevent equipment failures. Replacement and spare parts should be available at each farm to prevent delays in repairs. An on-site, written logbook should be used to record regular checks (ex: generator testing), routine on-site repairs, and major maintenance concerns that need to be scheduled. Major maintenance and mechanical repairs should be done between flocks and in conjunction with cleaning to minimize biosecurity risk on the farm. Pre-placement maintenance checks are very important and can help ensure the chicken house is ready to safely and comfortably house new birds. Create a written plan and checklist of areas and items that must be verified for maintenance before housing a new flock. Examples of items to include:
- Feed - check feed scales and calibrate weighing equipment to prevent over/under-feeding. Monthly calibration of feed scales is a good practice. Verify the clean-out process for feed bins to ensure that equipment is clean and dry prior to receiving new feed.
- Feed delivery systems - check augers, chains and feeder setup to ensure that the system will work to deliver feed to the birds and to ensure it is secure and will not result in bird injury.
- Water - check water lines and individual drinker nipples for water. Flush the water system to ensure all cleaning and disinfecting solutions have been cleared from the lines.
- Ventilation - check fan belts, fan motors, louvers, gas lines for heaters, etc. to ensure they will work correctly to maintain the appropriate temperature for bird comfort. Ventilate the house prior to receiving birds to remove chemical odors from the cleaning and disinfection process. Calibrate sensors and thermometers to ensure controller settings will be accurate.
- House structure - cycle (check) all curtains and vent doors to ensure cables are not tangled or broken which could impact the effectiveness of the ventilation equipment.
- House equipment - replace any broken or flickering light bulbs in the house, verify safety and security of any dividers or other bird equipment (ex: slats, nests, catch frames, scales, etc.) so that any repairs can be made prior to flock arrival.
- Emergency equipment - test the generator to ensure that it is working correctly to provide immediate backup power for the farm during an emergency. Generators should cycle under load once per month to ensure they are operational. Have an electrician or generator specialist conduct an annual review of the generator. Test the alarms, alarm system, etc. to verify that audible alarms are functional and radio/automated alarms contact the correct person(s) for an emergency.
- External environment - visually verify the conditions of the house (ex: cool cell pads, security of doors and drainage equipment, security of perimeter fence, vegetation and vermin control boxes, etc.) to ensure that biosecurity and premise security are functional.
Alarms and emergency planning
Issues may arise that require emergency responses. Minor events (power or equipment failures) and major events (severe weather, flooding, wind damage) can occur that can cause damage to housing and limit or prevent access to necessary resources including feed and water.
As a minimum, breeder operations should have a written plan for emergency responses that includes standard operating procedures (SOPs) to assess and repair structural damage, loss of power, loss of water, notifiable disease presence (on the farm or in the regional area), catastrophic issues causing the inability to deliver feed, and emergency depopulation.
Alarm systems should be used to constantly monitor the chicken house environment and housing systems (temperature, water availability, electricity, etc.) that are critical to supply the daily needs of the flock. Ideally, backup systems such as generators for electricity and a secondary water supply should be present on-site and should be regularly monitored. Contact information for emergency response services and staff responsible for addressing emergencies should be posted in a place where the information is easily accessible.