


Cobb Management Breeder Guide: Breeder flock transfer
Learn more about flock transfer, poultry sexing errors and photo stimulation 25 April 2024
 6 minute read
 By:
By: Part of Series:
Editor's note: This article is an excerpt from the Cobb Breeder Management Guide and additional articles will follow. The Guide was designed to highlight critical factors that are most likely to influence flock performance. The management recommendations discussed were developed specifically for Cobb products. The recommendations are intended as a reference and supplement to your own flock management skills so that you can apply your knowledge and judgement to obtain consistently good results with the Cobb family of products. To read or download the complete Guide or to view Cobb's other management guides, click here.
Breeder flock transfer
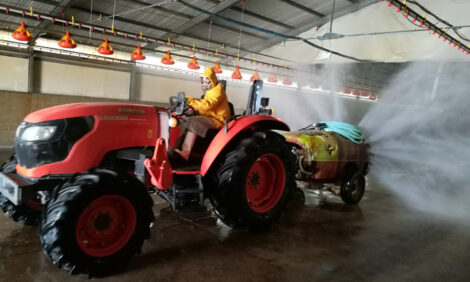
Age for transferring stock to the production farms is determined mainly by the facilities available, bodyweight and the lighting program. The transfer can be a very stressful time for the birds. Plan the transfer in detail and handle the birds carefully. Prior to transfer, the rearing and laying managers should meet to discuss the flock. A copy of the rearing records should be transferred with the flock to the production farm and include:
- details of disease challenges, medication, and vaccination programs
- transfer bird numbers
- bodyweights as they relate to standard
- water consumption
- fleshing and pelvic fat scorings
- rearing lighting program and intensity
- feed amounts and times of feeding
- other relevant information to assist the production farm manager during the transition period.
In some cases, it may be necessary to give additional feed several days before and/or after the birds have been transferred. The amount of extra feed and the time when it is given will depend on the season and the distance travelled. On the day of moving, birds should not be fed at the rearing farm to ensure that birds are empty (no feed in crops) to limit potential mortality, increased stress, and dirty crates.
When planning the transfer:
- The laying house must be ready to receive the flock, with the feeders, drinkers, and nest boxes fully operational, one week before the planned transfer date.
- Ensure that there are enough clean crates, coops or containers to move the whole flock.
- The final selection and transfer of the males should be done 2 to 3 days before females are transferred if sexual synchronization is optimal between the sexes.
- The females should be carefully observed and any birds that do not meet quality standards should be removed during transfer.
- Move the birds at night or in the early morning, especially in summer during hot weather.
- If using containers or coops with wheels, clear a path along the scratch area before removing the birds.
- Birds should have empty crops and digestive tracts prior to moving to reduce stress and keep the equipment cleaner.
Immediately post transfer:
- When taking birds out of crates or coops by hand, place them directly on the slats. If using modules with a loader or a pullet trailer to transfer birds to the laying house, birds should be placed on the litter since this process involves mechanical equipment. To prevent injury, never place birds directly on solid equipment (ex: feeder or nests).
- After arrival, provide feed in the tracks. Feed will provide a distraction, reduce stress, and help the birds become familiar with the new house. Depending on transportation and weather, feed amounts can be increased by 20 % for 2 to 3 days after the move.
- Observe the birds closely and perform crop checks to make sure that they have had access to feed and water.
- Walk through the house frequently to encourage birds to use the slatted area.
- Ideally, use the same drinker and feeder equipment styles in rearing and in production. However, if equipment is different carefully observe feeding the
first 3 days after transfer to correct any issues. - The flock will redistribute the shavings or straw the next day over the whole
scratch area.
Sexing errors (sex slips)
Sexing parent stock chicks is done in the hatchery to separate the females and males. The females are used as parent stock and the males are usually used in broiler production. Sexing chicks can be challenging and some sex errors (sex slips) occur during the sexing process. However, these errors are not visible in the flock until 12 to 16 weeks of age as males will develop a comb earlier than females.
The sexing error percentage in the fast feathering parent stock, which are sexable by wing feathers, is normally between 0.3 % to 0.5 %. However, the slow feather cross must be sexed by the cloaca. This is more complicated and usually results in more sexing errors (between 1 to 1.5 %).
Leaving sexing errors in the flock will compromise the genetic potential of the offspring. It can also distort feather coloring and cause lower bodyweight as well as poor feed conversion, processing yield and uniformity in broiler flocks. For these reasons, it is important to eliminate all the sexing errors before 20 weeks of age.
Producers with good dark out rearing conditions and low light intensity (2 to 4 lux; 0.2 to 0.4 fc) may not recognize sexing errors easily. In this case, sexing errors can be detected and removed at 18 weeks of age during the individual vaccinations when the light intensity is high enough on the vaccination table to distinguish the sex errors. Any sex errors not detected during the vaccinations are usually clearly visible when moving females to
the production house and can be removed at that time.
After transfer, it is important for a minimum of 2 people to walk through the flock before hatching eggs are collected to remove any remaining sexing errors from the flock (this is done when the flock is between 22 and 24 weeks of age). At this point, sexing errors can be recognized by examining the 4th and 5th toes (also called dewclaws) which are treated to condition the nails in males.
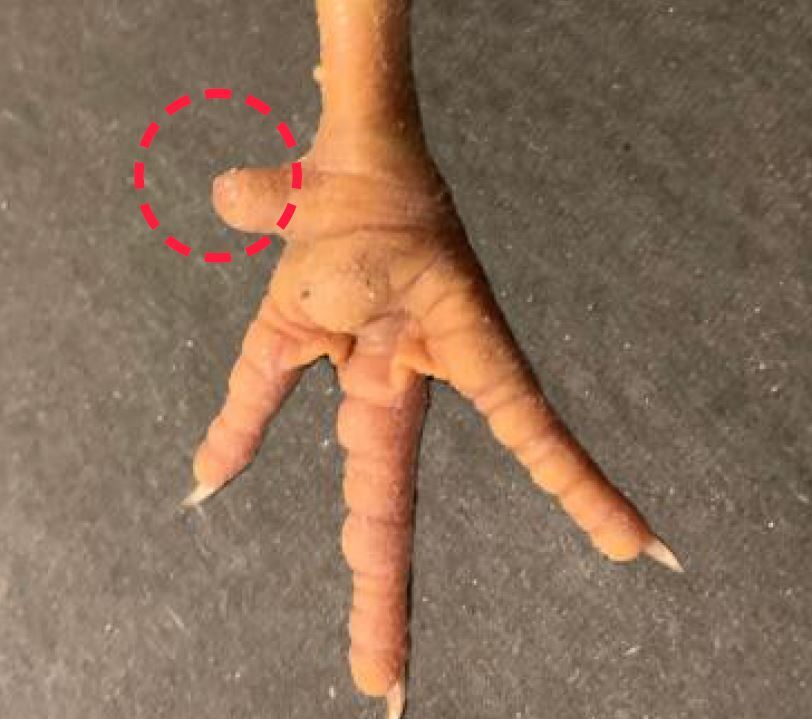
One way to identify sexing errors in males after transfer is to inspect the toes. Males that were sexed correctly should have their toes (dewclaws) conditioned to remove the nail (as shown in the photo). Any males without conditioned toes are most likely sexing errors and should be removed from the flock.
Preparation for photo stimulation (20 to 24 weeks)
Ideally, at the start of photo stimulation, the ratio of pullets with a fleshing score of 3 and 4 should be 60 and 40 % of the females respectively. The first photo stimulation should be between 147 and maximum 154 days of age. After first photo stimulation, use small feed increases of 2 to 4 g per female per week until the onset of production (around 5 % of production).
Physiological readiness for photo stimulation
The flock is prepared for photo stimulation when dry (before feeding) bodyweight is 2450 to 2600 g (5.40 to 5.73 lb) for fast feathering pullets and 2500 to 2600 g (5.51 to 5.73 lb) for slow feathering. In addition, 95 % of the pullets have a fleshing score of 3 or more and 85 % have pelvic fat.
A pullet in the correct condition will have a prominent fat deposition under the wing. Parallel to this fat deposit is a large blood vessel. This combination is often referred to as the fat vein. The fat vein can be used to determine subcutaneous fat deposition. However, pelvic fat is normally deposited earlier than the subcutaneous fat vein.
The fat vein begins to appear in pullets around 21 weeks of age. Evaluation of the fat vein is most informative after 25 weeks of age, when production has started. At this point, the pelvic bones are no longer a good indicator of how much fat is being deposited in the abdominal cavity because they have widened considerably to allow for the passage of the eggs. Once the pelvic bones begin to separate, the pelvic space will widen after photo stimulation. This change should transition from a width of less than 1 finger for a pullet at 21 weeks old to a width of more than 2.5 to 3 fingers in fully producing hens. This is the primary reason why it is better to use the fat vein as an indicator of fat reserves after the females start production. It is always best to delay photo stimulation if the birds are not in the correct condition (body composition), as this will improve their performance, health and welfare during the laying phase.