


US Poultry Industry Manual - Broilers: brooding
 By:
By: Part of Series:
Editor's Note: The following content is an excerpt from Poultry Industry Manual: The Foreign Animal Disease Preparedness and Response Plan (FAD PReP)/National Animal Health Emergency Management System (NAHEMS) Guidelines which is designed to provide a framework for dealing with an animal health emergency in the United States. Additional content from the manual will be provided as an article series.
The two major stages of raising broiler chickens are brooding and grow-out. Brooding occurs during the initial 14 days of a broiler chicken’s life or until the chicks are feathered and able to maintain body temperature. Frequent monitoring by producers enables quick identification and correction of problems, as well as documenting good, consistent growing conditions. Brooding is the most critical time in the life of a flock, and producers should monitor flocks a minimum of 3 times each day and walk the length of the brooding area several times during each inspection of the flock. The quality of care given to chicks during the first hours and days in the house can have a profound effect on final flock performance. While walking through the house, producers check feeders and drinkers, and monitor temperature, ventilation, and litter conditions. Dead birds need to be removed, recorded in the mortality record, and disposed of properly.
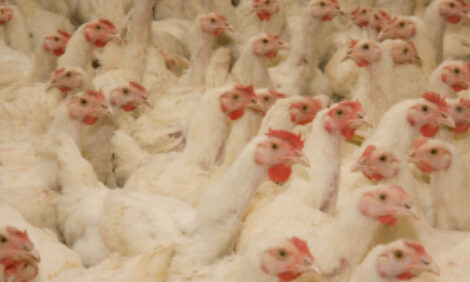
Chicks that cannot reach food and water should be culled, documented in the flock records, and discarded. Producers should observe the behavior, activity level, and distribution of chicks in the house. Uniform distribution of chicks, with all areas of the house containing some chicks, is the goal. Signs of discomfort or stress should be investigated and addressed quickly. Distress signals include loud chirping, panting, or failure of lethargic, sluggish chicks to move away when approached by the grower. Loud chirping may indicate overheating, lack of feed, or lack of water. Panting by a large number of birds indicates the house is too warm and needs to be cooled down. Special attention should be given to flocks when weather conditions are unusually hot or unusually cold, or when large fluctuations in outdoor temperatures occur during the day. Flocks showing signs of disease warrant extra care and monitoring.
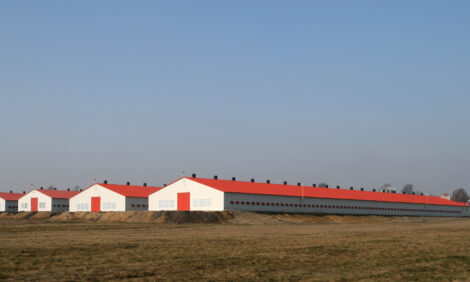
House Configuration
Two systems of temperature control are employed during brooding: a) whole house brooding with placement of chicks throughout the entire house and b) partial house brooding with chicks placed in a limited area of a house. Whole house brooding typically occurs in houses with solid sidewalls or in houses located in warm climates. Partial house brooding is used by most broiler producers to lower energy costs by heating only part of the house and reducing labor required to keep feed trays filled. Floor to ceiling plastic brooding curtains are placed across the width of the house to partition the house in half or thirds, and a solid barrier is placed on the floor in front of the curtain to prevent drafts.
The area of the house used for brooding is called a brood, brooder, or brooding chamber. Typically, half of a chicken house is initially heated with radiant (canopy) heaters so chicks can select their preferred temperature. The remainder of the house is empty until the chicks are 11 to 16 days of age. In summer, broilers may be released into the remainder of the house at 11 days of age to reduce early bird density. In winter, partial house brooding may be extended to 16 days of age to reduce heating costs. Since the first few days of the brooding period require the greatest amount of heat, partial house brooding saves a significant amount of fuel.
At 11-16 days of age, broiler chicks require more floor space to reduce competition for feeder and drinker space. Preparations to provide a uniform, comfortable environment for the chicks will encourage them to move into the newly opened section of the house. Prior to removing the plastic curtain divider, the adjacent empty section of the house must be heated and ventilated to the same temperature as the area of the house being used for brooding.
A uniform temperature will heat water in the water lines, encouraging water consumption and preventing broilers from becoming chilled by drinking cold water. Additionally, feeders in the unused section of the house must be filled with clean, fresh feed and supplemental feeders may be moved to the unused section of the house to help stimulate bird migration. Once these preparations are made, the brooding curtain and solid barrier on the floor can be removed, allowing chicks to occupy the remainder of the house.
Feed
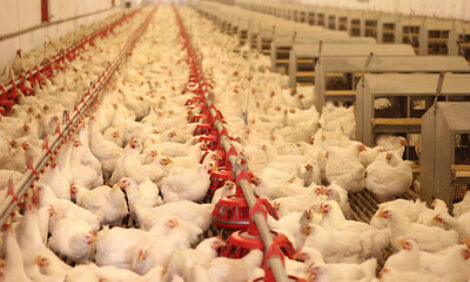
The most important goal of management during the first week is to ensure that baby chicks consume enough feed and water because chick weight at 7 days of age is strongly correlated to final body weight at slaughter. Feed intake during the first 7 days is exceedingly important because chick weight is directly related to feed consumption and chicks should weigh 4.5 to 5.0 times their initial body weight by 7 days of age. Seven day weights are a measurement of the success of brooder management. Broiler chickens should be fed ad libitum so their crops are full of feed and water when lights are turned off in the evening and feed and water are immediately available as soon as lights are turned on in the morning.
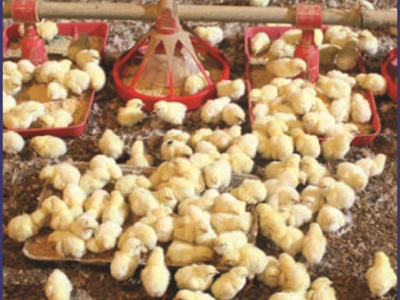
Careful management and plenty of extra feed trays help chicks readily access feed and are necessary to ensure a good start. Feed should be clean, free of mold and have consistent particle size with minimal fines (powdery feed). Supplemental feeders are placed in houses during brooding and are essential for providing ample opportunity for young chicks to access feed. Supplemental feeders are plastic or paper feed trays that may be hand-filled and may include paper laid on the litter surface. Approximately 25% of the brooding area should be covered by the supplemental feed trays and paper with automatic feeding and drinking systems nearby.
Most feed lines contain extra spouts that can be turned down so feed pours directly into the supplemental trays. Feed trays should be low to the ground and easy for chicks to access. After chicks learn the location of feed lines, growers can begin to remove supplemental feed trays, with one third typically removed over a period of several days. Sudden changes in feed location can disorient chicks, causing them to eat litter and predisposing them to disease.
Phase feeding of poultry started in the 1960s and is used to meet changing nutrient requirements of chickens as they grow. Four to 6 diets may be fed throughout the life of a broiler chicken. Separate feed formulations are used for pre-starter, starter, grower, finisher, and withdrawal rations. Transitioning from one feed ration to another is based primarily on the age and weight of broiler chickens in the house. During the brooder period, pre-starter and starter feeds are presented to the chicks in the form of crumbles (pelleted feed that has been crushed into smaller particles) or mini-pellets.
Prestarter feeds need to provide nutrients that are easily digested because young chicks lack some of the digestive enzymes that digest carbohydrates and amino acids found in older birds. Prestarter and starter feeds stimulate a good appetite and maximize nutrient intake to support a high growth rate. They are fed while the chicks are relatively small and represent only a small part of total feed costs during the life of a flock.
Water
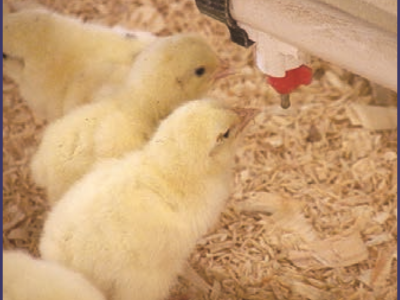
Water is the most immediate need when chicks arrive at a broiler house because they can easily dehydrate during hatching, processing, and transport to the farm. Supplemental mini-drinkers are placed near automated feeding and drinking systems and never allowed to run dry. Prior to arrival of chicks, water lines need to be filled with adequate time for water in the lines to warm. Water temperature during the first week should be around 77°F because cold water will chill chicks. At chick placement, drinkers are lowered to the chick’s eye level for the first 2 to 3 hours with sufficient water pressure to produce a droplet of water suspended from the nipple.
Suspended water droplets and a narrow layer of paper under water lines may be used to attract chicks to the water source. The sound of chick feet clicking on paper attracts other chicks, which discover the nipple drinkers when they investigate the noise. Within a few days, the thin paper breaks apart and disappears. Supplemental mini-drinkers can be removed approximately 2 days after placement.
Light
During brooding, as well as during the entire flock life, lighting is provided during the majority of the day. Adequate hours of light each day and adequate light intensity are needed during the first 7 days to stimulate feed consumption and development of the digestive system. Providing chicks with 24 hours of light during the first day after placement is common. From days 2 through 7 after placement, 23 hours of light followed by 1 hour of darkness is typically recommended. During the first week, a light intensity of approximately 2 to 4 foot-candles (30-40 lux) at chick height over the feed and water lines is used to help stimulate feed consumption.
Too little light exposure during brooding results in chicks failing to thrive. During the second week, foot candles can be gradually decreased to around 0.5 to 1.0 (5–10 lux), while the daily photoperiod changes to approximately 18 hours of light and 6 hours of darkness. A period of darkness is provided each day to allow the chicks to become familiar with darkness so they do not panic and suffocate from piling in the event of an electrical system failure. Melatonin is produced in the pineal gland during hours of darkness, which promotes development of the immune system. Lower light intensity has been associated with a reduction in aggressive behaviors such as fighting, cannibalism, and feather picking, and a reduction in skeletal disorders including tibial dyschondroplasia and enlarged hocks.
Preventing excessive growth between 7 and 21 days of age helps reduce mortality from metabolic conditions, such as pulmonary hypertension syndrome (“ascites”) and sudden death syndrome. Growth control may be achieved by physical feed restriction, diet dilution, and lighting schedules, which limit feeding time by providing a period of darkness. Slower initial growth followed by compensatory growth promotes improved feed efficiency and allows the skeleton of broiler chickens to develop and become more mature before significant amounts of muscle mass are added.
Temperature
Maintaining correct environmental temperature for chicks during the first two weeks of life is critically important. At hatch, and for about the first 5 days of life, chicks are poikilothermic, which means their body temperature is determined by the temperature of their environment. Thermoregulation is not fully developed until sometime between 7 and 14 days of age. Chicks that are too hot or too cold will have less than optimal feed consumption, growth rate, and feed conversion. When ambient temperatures are in the thermal neutral zone, chicks can maintain their body temperatures at normal levels (104-106°F rectal temperature measured with a child’s ear thermometer) with minimal energy expended to regulate their body temperature. Temperatures outside the thermal neutral zone result in less energy expenditure for growth and more energy spent cooling by panting or warming by increasing body heat production.
Chicks that are too hot have depressed appetites, pant, and stretch out on the litter. Panting leads to excessive water loss and dehydration. Chicks that are too cold tend to sit on the floor, huddle together for warmth instead of searching for food or water, and utilize energy in the feed to generate body heat instead of for growth. Chicks that have been chilled are more susceptible to disease because their immune and digestive systems have been compromised. Chilled chicks have cold feet, which can be detected by placing a chick’s feet on the caretaker’s neck.
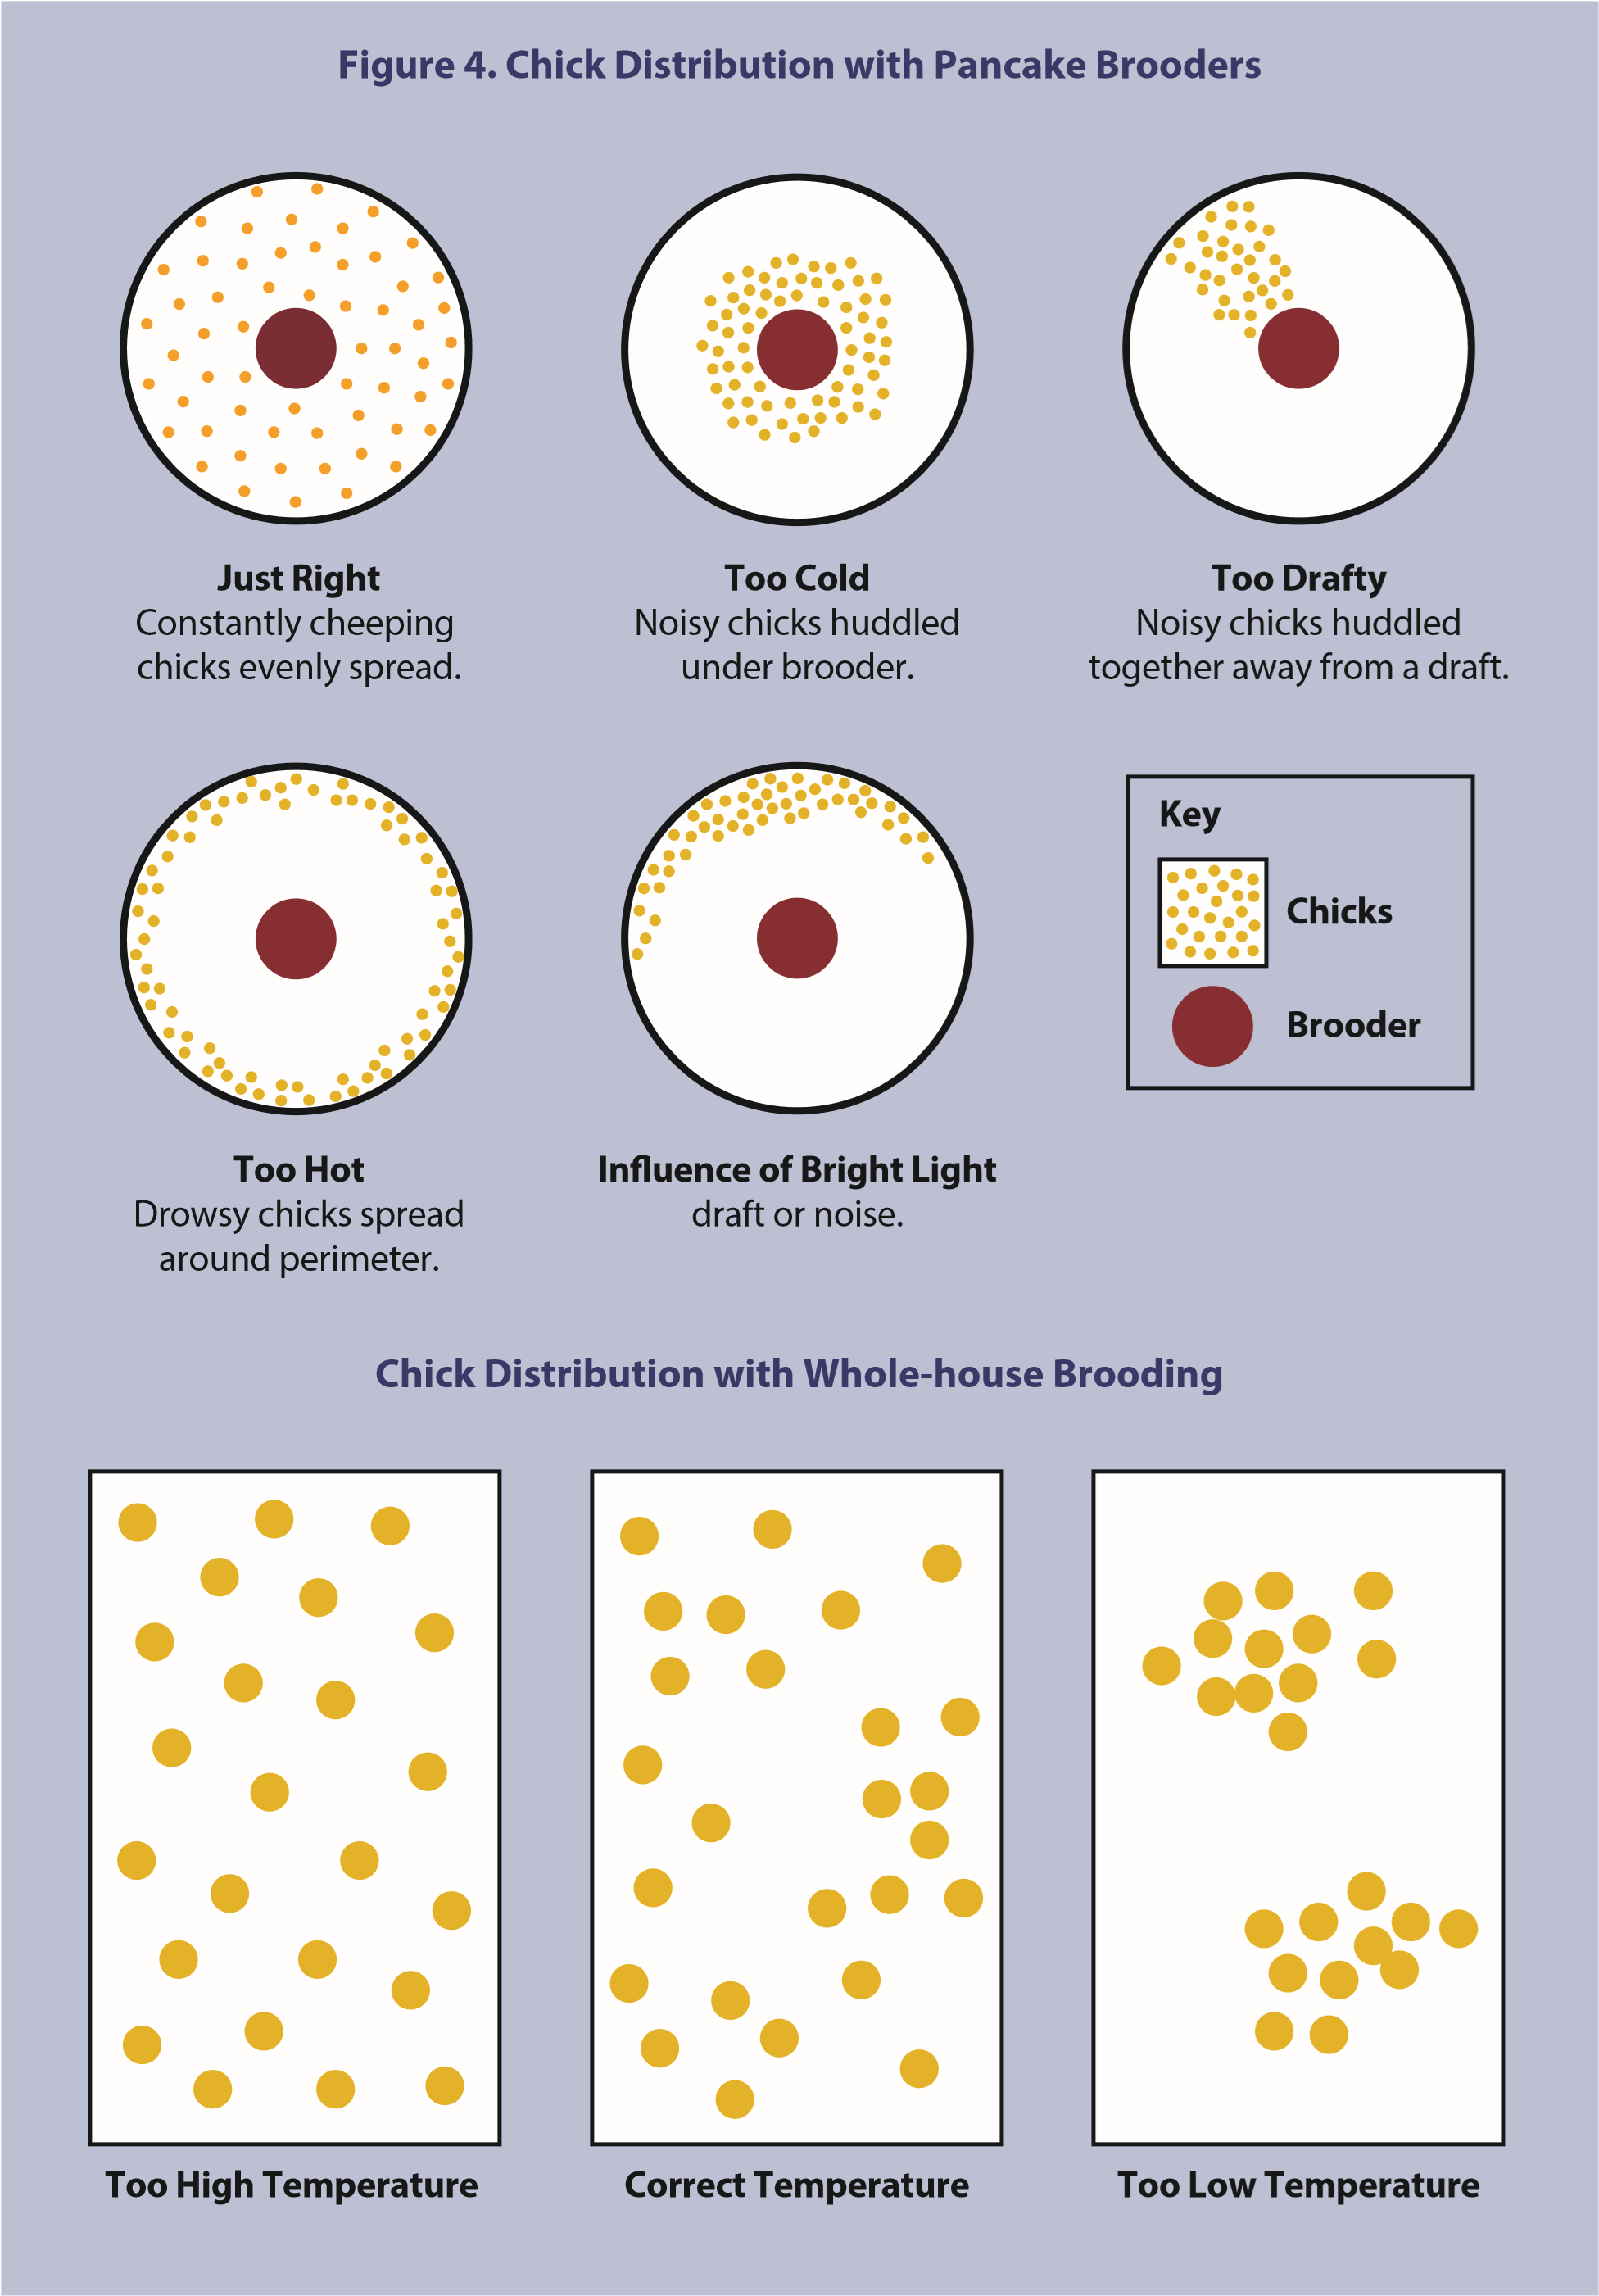
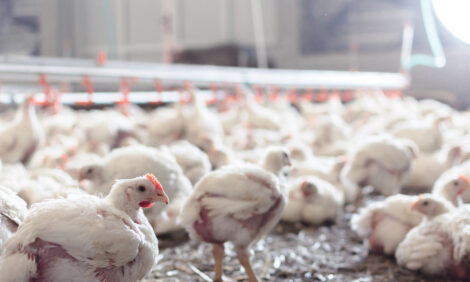
Visual observation of chick distribution in a house at 1 - 2 hours after placement allows growers to gauge the comfort of chicks and make appropriate temperature and ventilation adjustments. In houses with pancake heaters, either alone or in combination with large space heaters, chicks should be distributed uniformly under and around the outer area of the pancake brooders. If chicks are far away from the heat source, the stove area is too hot. If chicks are huddled and clustered directly under the stove, the temperature is too cool. Non-uniform clustering of chicks with avoidance of certain areas indicates a draft. In houses heated with large space heaters, the ideal distribution of chicks is uniform spacing throughout the house, with no large areas being avoided and no large groups of chicks clustered together.
Chicks normally group together, but warm chicks will break from these groups and randomly form new groups that continue to form and disperse. If chicks avoid certain areas in a house, they may be too cool or drafty; large open areas with no birds usually indicate drafts. Chick distribution and activity associated with different temperature and draft conditions under pancake brooders are shown in the Cobb Broiler Management Guide (2010) and chick distribution with different temperatures during whole-house brooding is shown in the Ross Broiler Management Guide (2010) (Figure 4).
Floor temperature may be more important than air temperature because chicks are in contact with litter via bare feet. If the floor is cold, chicks lose body heat to the floor through their feet and through their body when they sit down. Chicks placed on cold litter will migrate to feeder lids within 2 hours of placement. Floor temperatures can be measured with an infrared thermometer. During brooding with force air heating, the target floor temperature on day one is 90°F. With radiant heaters (brooder stoves), the target floor temperature is 105°F. Brooder houses should be preheated so the floor temperature, air temperature, and relative humidity are stabilized by 24 hours prior to chick placement.
Air temperature recommendations vary with relative humidity and strain of chick, but typically ambient air temperature at chick level should be around 90°F (or a little less) when chicks enter a house with a relative humidity of 60-70% to prevent dehydration of chicks. Dry bulb temperatures should be higher when relative humidity is lower and vice versa. Air temperatures should gradual decrease thereafter. Insulated broiler houses have ventilation systems designed to keep house temperatures within 3 degrees of the desired temperature.
Adjustments to temperature should be made gradually and flocks need to be observed after adjustments are made to be certain that birds are not excessively cooled or heated. While automated temperature control systems have alleviated the grower of making manual adjustments to control the environment, growers must still be conscious of potential problems that can arise in controllers and check house temperatures frequently. Recommended dry bulb house temperatures at different broiler ages when relative humidity is 60% or 70% are shown in the table below taken from the 2009 Ross Broiler management Guide.
Table 9. Recommended Dry Bulb House Temperatures |
|||
Dry Bulb Temperature |
|||
Broiler Age (Days) |
Target Temperature |
60% Relative Humidity |
70% Relative Humidity |
1 |
86.0 |
87.4 |
84.6 |
3 |
82.4 |
84.0 |
81.1 |
6 |
80.6 |
81.9 |
78.8 |
9 |
78.8 |
80.1 |
77.0 |
12 |
77.0 |
78.3 |
75.2 |
15 |
75.2 |
76.6 |
73.4 |
18 |
73.4 |
74.5 |
71.4 |
21 |
71.6 |
72.9 |
70.3 |
24 |
69.8 |
71.1 |
68.4 |
27 |
68.0 |
69.3 |
66.7 |
Ventilation
Minimum ventilation rates are needed to remove ammonia, moisture, carbon dioxide, and carbon monoxide from broiler houses. During brooding, the goal for air exchange is replacement of approximately half of the air in an entire house each minute on a 5 minute cycle. Therefore, if a house is 500 feet long, air should move at the rate of 250 feet per minute. Minimum air exchange rates are maintained by fans controlled by a timer. Minimum ventilation recommendations in cubic feet per minute for a house designed to hold 20,000 broiler chickens have been provided by Lacy and Czarick from the University of Georgia.
Table 10. Minimum Ventilation Rates (Cubic Feet Per Minute) |
|||
Nighttime Temperature |
|||
Bird Age (Weeks) |
Below 30°F |
30 - 60°F |
Above 60°F |
1 |
2,000 |
2,000 |
2,000 |
2 |
3,000 |
4,000 |
5,000 |
3 |
5,000 |
7,000 |
8,000 |
4 |
8,000 |
10,000 |
11,000 |
5 |
11,000 |
13,000 |
14,000 |
6 |
14,000 |
16,000 |
17,000 |
7 |
17,000 |
19,000 |
20,000 |
Relative humidity should be monitored, with a target of 60-70% during the first 3 days in the brooder chamber. Humidity exceeding 70% limits the amount of evaporation that occurs in a house, causing wet litter and excessive litter caking. Wet litter combined with high litter pH promotes microbial growth, including bacterial pathogens, and ammonia production. If relative humidity falls below 50% during the first week of life, chicks will begin to dehydrate, the house will become dusty, and respiratory problems may occur in the flock. High pressure foggers or misters used for cooling on hot days, or backpack portable sprayers, can be used to increase relative humidity during brooding. As chicks grow older, relative humidity can decline with no ill effect.
Ammonia can be a problem when brooding on built-up litter during cold times of the year. Atmospheric ammonia should never exceed 20 ppm. In addition to causing corneal ulcers and blindness, high levels of aerial ammonia can damage cilia in the respiratory tract. Loss of cilia prevents removal of bacteria associated with inhaled dust particles, which may lead to bacterial respiratory tract disease and septicemia. High ammonia levels in the litter may contribute to foot pad “burns” and breast blisters causing broilers to be downgraded at processing. It is important for broiler producers to minimize foot pad damage so chicken feet (“paws”) can be sold in Asian markets.
Litter
At the beginning of brooding, litter can be new, or as is more often the case, reused litter from a previous flock. Litter used for brooding successive flocks is referred to as “built up” litter. Chicks on built up litter generally do better than chicks on new litter. The latter can result in a phenomenon called “New house” syndrome. If new litter material can be acquired at a reasonable price and land is available for disposal of old litter, then most broiler houses are totally cleaned once per year. Old litter is spread on farm land as a fertilizer and new litter is placed in the house. However, availability and cost constraints associated with replacing litter for each flock often necessitate reusing litter.
After a flock has been removed from a broiler house at the end of a production cycle, litter intended for reuse is “de-caked”. “De-caking” is accomplished by removing the wettest and most compressed parts of litter (top few inches) from the chicken house followed by tilling and evenly spreading the remaining litter across the floor in preparation for the next flock. “De-caking” releases trapped ammonia and allows the litter to dry. Another procedure that is gaining favor is to windrow the litter down the center of the house and let it compost. Composting is an excellent way of reducing pathogens in litter. After it is spread out in the house, old litter is usually “top-dressed” by placing 1- 2 inches of new litter over the old litter.
It is important to maintain proper levels of litter moisture (20-30%). Litter moisture can be evaluated by squeezing it in the hand. When litter is released, it should slightly adhere to the hand and break down when dropped. Litter that is too wet (> 35%) forms a complete ball when squeezed. Wet litter can result in excessive ammonia production by bacteria in the litter and contributes to development of breast blisters, foot pad ulceration, and excess condemnations at processing. Wet litter can be caused by water line leaks, excess humidity, inadequate moisture removal due to poor ventilation, watery droppings associated with enteritis, high salt or high protein rations, poor quality fats, and improper drinker management. Lack of clumping when squeezed indicates the litter is too dry, which can lead to dusty conditions and contribute to respiratory infections.
When proper litter conditions are maintained, growth will be closer to optimum targets, there are few to no flies and parasites, feed efficiency is improved, and feathering is better.
Chick Delivery and Placement
Chicks are transported from hatcheries to farms on the day they are hatched. Chicks delivered to a single house should be from breeders of a similar age and genetic background. Under an “all-in, all-out” system, all chicks enter a house on the same day and leave the house for transport to a processing plant on the same day. Most commercial broiler hatcheries are completely automated with little labor needed for separation of chicks from shells, vaccinations, or placement into delivery boxes. The majority of the broiler industry uses straight run chicks, which include males and females in the same flock. No beak conditioning is done on broilers at the hatchery.
Vaccinations post-hatching are done primarily through spray cabinets where each box of 100 chicks is dosed with an aerosol vaccine. Spray vaccines for coccidiosis are usually colored so chicks will ingest the vaccine off the down of other birds. Prepared chicks are placed in ventilated boxes and loaded into an environmentally controlled vehicle, usually a chick bus or enclosed trailer that may transport over 100,000 chicks at a time. After chicks are taken to a farm, they need to be immediately unloaded from the transport vehicle and moved into the chicken house to avoid dehydration and overheating. On delivery of chicks, growers assume responsibility for care of the birds.
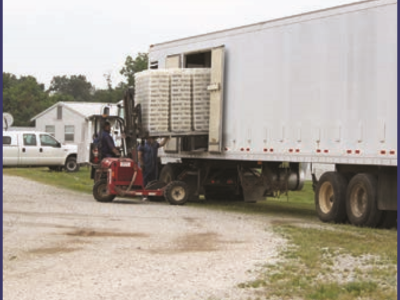
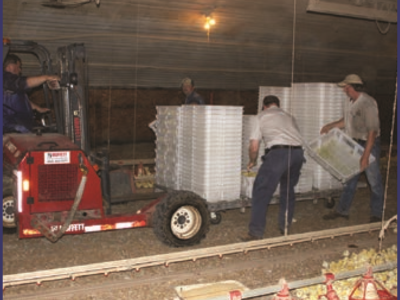
Growers and company personnel are responsible for placing chicks inside the house. Pallets of chick boxes are driven into the house on a forklift. Starting at the back of the house, chick boxes are emptied by hand so chicks are placed near to and have immediate access to clean, fresh feed and water. If supplemental feed is on paper, chicks should be placed on the paper. Placement of 20,000 chicks can take less than ten minutes with a skilled crew. Chicks are monitored to make sure they are locating feed and water, and to ensure house temperature and ventilation are correct. The goal is active, curious chicks that eat and drink in less than 24 hours.
By 8 hours after placement, at least 80% of chicks should have crops that are full, soft, and rounded if chicks have been eating and drinking properly. By 24 hours after placement, 95-100% of chicks should have a full crop. A crop-fill evaluation should be done on at least 100 chicks selected from three different locations within the house. If feed consumption is delayed, chicks will use both fat and protein from their yolk sac for energy resulting in inadequate protein available for growth.
Imprinting
During the first two weeks of life, chickens imprint on their environment. Imprinting involves formation of habits and associations that remain throughout their lives. Producers have a brief opportunity to introduce flocks to positive habits and conditions. Chicks are stimulated to locate feed and water as soon as possible and are introduced to periods of darkness. The imprinting period is a good opportunity for producers to control and encourage desirable behaviors in a flock.
Reference: "USDA APHIS | FAD Prep Industry Manuals". Aphis.Usda.Gov. 2013. https://www.aphis.usda.gov/aph...
The manual was produced by the Center for Food Security and Public Health, Iowa State University of Science and Technology, College of Veterinary Medicine, in collaboration with the USDA Animal and Plant Health Inspection Service through a cooperative agreement.

More in this series: Poultry FAD Preparedness & Response
October - August 2022


 20 September 2022
 4
minute read
4
minute read
 8 September 2022
16
minute read
8 September 2022
16
minute read
 19 August 2022
13
minute read
19 August 2022
13
minute read
 12 August 2022
27
minute read
12 August 2022
27
minute read